


The nano reef: set-up and basics
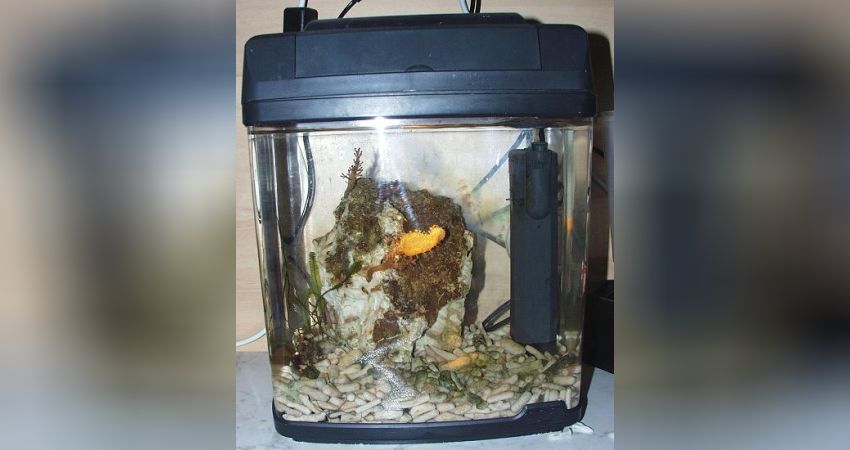
Ein Nano-Riffaquarium in der Einfahrphase
Learn what you need to set up a nano reef aquarium and what you should look out for. A report by Jannes Freiberg
Ein Nano-Riffaquarium in der Einfahrphase
For some years now, nano reef tanks have become increasingly popular. Whether as a start in marine aquaristics or as a second or third tank for an already existing hobby. Nano tanks have their own charm because here you pay more attention to small things, which is quite different from the large aquariums in which many fish often swim. These often attract the attention of the keepers, so that the small things are easily lost. But the small things are the interesting thing about a nano tank.
Specially for the friends of nano reef aquaristics, Jannes Freiberg will publish a series of several parts to gradually bring the relevant üabout this small but interesting hobby. This includes information about the choice of tank, the technique and what you should pay attention to. And of course for many the most important thing, which animals are especially suitable for the small tanks. It goes without saying that not every animal you can buy can be placed in a nano tank. There can also be various problems with socialising with each other. Jannes himself runs a small nano as an introduction to aquaristics.
Introduction:
Many people nowadays want to have a marine aquarium. Whether this happens in a pet shop, at a friend's house or during a TV report, it doesn't matter - what is important is the sudden desire to have a colourful coral reef at home. And although a large aquarium is much easier to maintain and less demanding, the trend towards so-called "nano reef aquariums" has recently emerged. And although I would like to point out once again that you are doing yourself a great favour if you choose a tank that is as large as possible, I would like to explain below in a way that is as beginner-friendly as possible how to successfully set up and maintain such a nano reef.
What is a nano reef?
This question is usually asked first, and the definition is indeed not simple. A nano reef is, at least in my opinion, a small aquarium with a maximum capacity of three litres, but usually only 12-15 litres. This tank is maintained in the same way as a large one and is stocked with corals, lower animals and even tiny fish. A nano reef, if well constructed, is a tiny, functioning habitat where more attention can be paid to the smaller animals that would be lost in a large aquarium. In the meantime I have even come to the conclusion that these small animals are much more interesting to observe than large, impressive fish, but of course that is something everyone has to decide for themselves.
Mistakes and considerations
First of all, before we get to the actual construction of the reef, I would like to encourage the reader to make a few considerations and clear up any mistakes.
Die erste Einrichtung
First of all, there is the claim that nano aquariums are simpler because of their small size. This may still be true to the extent that cleaning the glass or the filter is easier, but on the other hand, in a nano tank you have to pay meticulous attention to the water values - every little mistake, every corpse that is not removed immediately can cause the entire tank to topple over! Furthermore, there is not even the slightest choice of animals that you know from large aquariums - if you put in an animal that is too large (and this usually starts at 6 cm!), it will only cause unnecessary distress, while this animal will completely ruin the water values as a heavy burden on the aquarium system. And this does not only apply to fish, but also to corals, anemones and crustaceans, so that they do not become too large for the small aquarium.
After all, these mini-aquariums are more work than you think. If you want to build up a small coral reef, you must always keep an eye on the corals so that they don't take the light away from others by growing too much, for example, and if necessary do some gardening. Of course, they also need to be fed regularly, and then there is the weekly water change, for which the seawater needs to be stirred up.
And now, finally, a thought that everyone who is planning a nano reef and has not yet been put off by my descriptions should ask: "Why do I want a small reef? Why not a big one?" And please be honest with yourself, and believe my explanations when you think about it - I know what I am writing.
.To begin with:
Whoever is still seriously thinking about a nano reef should first acquire some basic knowledge about reef aquaristics in general. For this I recommend the 1x1 of marine aquaristics and the book Nano Reef Aquariums by Daniel Knop.
The right tank, the right place
Logically, planning an aquarium also involves choosing the right tank. In normal reef aquaristics, the principle applies: the bigger the better. Here, too, I would like to point out that nano aquaristics only provide very limited space, which is used up faster than you think. If you prefer to have a large variety of species in your aquarium, you should consider a larger aquarium.
Nano aquaristics includes all smaller aquariums that are still below the usual sizes for reef tanks. There is no fixed size for nano aquariums, some nano tanks only hold 4.5 litres, others are relatively large at 100 litres - the usual size for such aquariums is between 10 and 30 litres.
Glass aquariums:
Glass aquariums are probably the most common choice for budding aquarists. They come in numerous sizes, such as 30x20x20cm or even 30x30x30cm. The aquariums are often sold without a cover, but this is not a big deal, as I will describe how to build a cover in a later chapter. In any case, only silicone-bonded aquariums should be used here - although there are also older tanks with a frame construction, these should not be used, as any metal has no place in aquariums! EVERY metal rusts at some point, especially under the permanent influence of salt water, and it is all too easy for these metals to get into the water - certain death for fish and invertebrates.
Examples:
Beispiele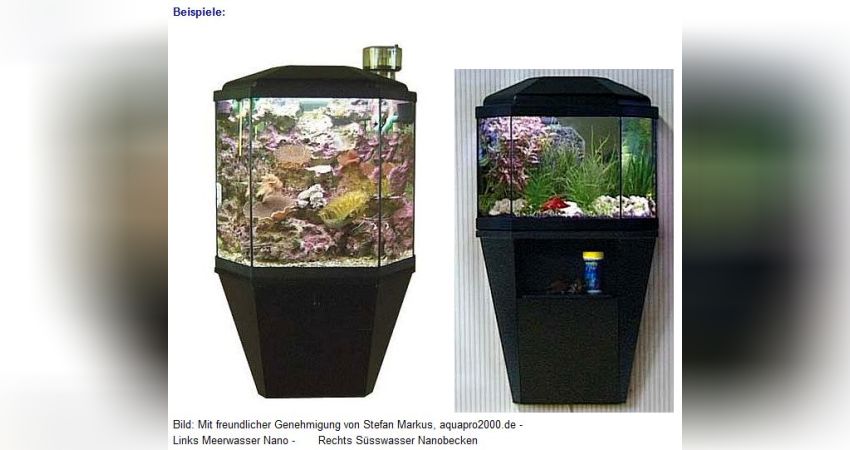
Plexiglass aquariums:
There is also the somewhat more expensive variant, small aquariums made of Plexiglas. The panes are "more transparent" than glass panes, and the plexiglass aquarium also weighs less than a corresponding glass tank - but this fact is more important for larger aquariums. In my opinion, Plexiglas panes have a decisive disadvantage: they are very sensitive and quickly become dull for precisely this reason. Even with careful cleaning, it is hardly possible to avoid scratches, so many tanks simply become unsightly after a while. But this is a circumstance that every aquarist must consider for himself - it is perfectly possible to clean these panes with cotton wool or similar. This method is a little more time-consuming, but avoids scratches to a large extent.
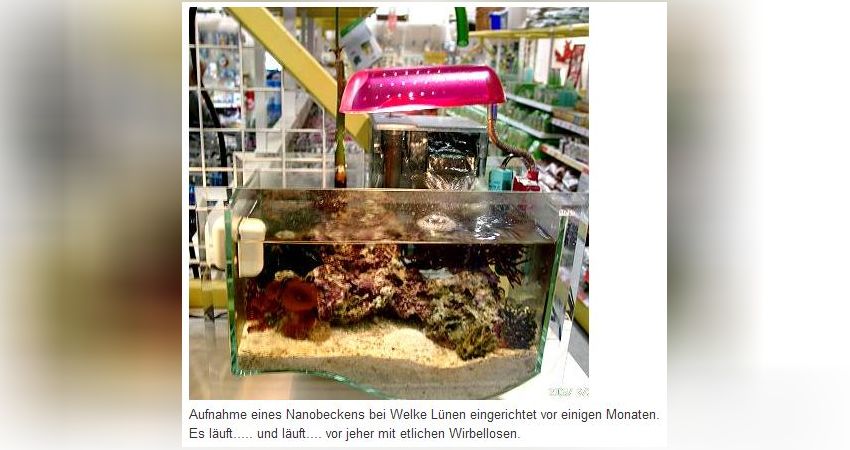
Komplettaquarium von Red Sea, fotografiert bei Welke Lünen 
Es gibt viele diverse Variationen bei Welke Lünen. 
Complete sets:
For some time now, more and more small complete sets have been appearing in the trade under imaginative titles such as "living room aquariums". These are often aquariums of about 15 litres, which are either hexagonal, columnar or rectangular. These aquariums are made of plastic or Plexiglas, so that they also suffer from the disadvantages mentioned above - but, as I said, it is also possible to keep these aquariums in good condition.
Many of these tanks contain only small T8 luminaires, but in nano aquaristics at least T5 luminaires must be used (more on this in the "Lighting" section). There are exceptions, i.e. complete sets with good lighting (e.g. HQI simulation or several T5s), but this is not always the case and should be checked beforehand. Otherwise I think these aquariums are well suited, as they usually have a sufficient filter with good flow, and any cooling and heating systems that may be needed can usually be installed later with a little skill, as can small shut-off valves.
Important: No matter what type of aquarium you choose: Before using it, it should be cleaned GREATLY (but without cleaning agents), and left to fill for at least a day to check for any leaks!
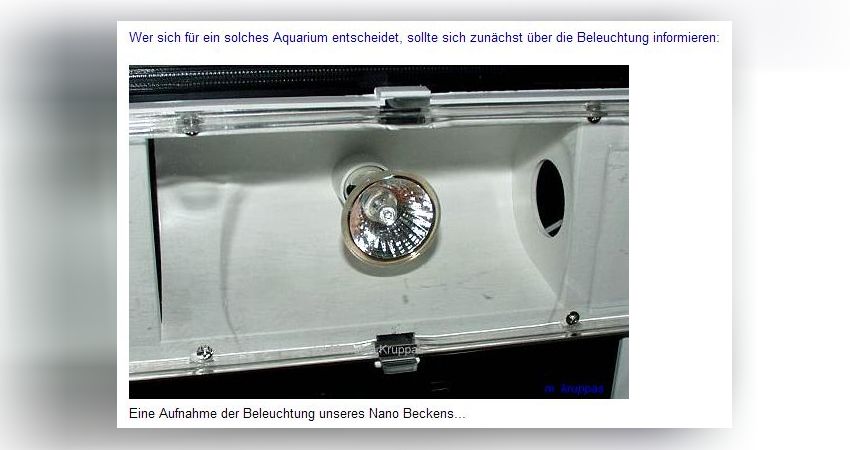
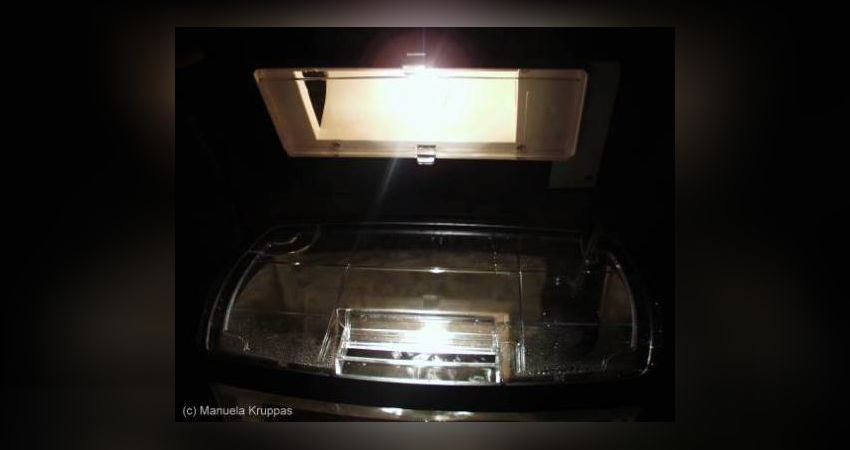
The right type of aquarium is the one you want to use. The right location The space should be stable - a wobbly table or a bookshelf is not the right place, because remember: an aquarium with a capacity of 15 litres can easily weigh 30 kg with substrate, live rock and hard corals! It is better to have a stable cabinet or table on which it can stand permanently. It is also important that the aquarium is easily accessible - when The aquarium should be placed where it can be observed. You can watch it for hours, but ultimately only if the place is comfortable and you don't have to strain your neck. If this does not fit with the above criteria, or if you can no longer realise a planned place, it is worth thinking about where else you would like to be. With a little imagination and imagination, it is even possible to create completely new places to relax. Lighting a nano reef HQI, T5, T8? All these abbreviations can be quite confusing, especially for beginners, so I would like to explain them briefly here. T8 luminaires T5 and T8 in direct comparison HQI HQI is a somewhat strange term that has defiantly caught on over time- it actually refers to metal halide lamps. As this lighting is very powerful, it is very practical for large aquariums, but not for the nano aquarium, as the smaller burners are still 70W. With HQI, there are screw bases and plug-in bases, but for nano tanks, only the plug-in bases with 70 watts come into question. T5 tubes View of a "large" T5 lamp, white and blue mixed How many tubes, which ones and how big? The combination of white and blue requires that at least two tubes are used. This amount of light is usually sufficient for some of the more robust corals, disc anemones and crustaceans, but I believe that lighting should not be skimped on - stony corals and anemones also have their appeal, and many aquarists are annoyed when they have to upgrade their lighting system afterwards in order to keep such species in a species-appropriate manner. I consider at least three to four Röhren á 6 W to be ideal, and this can usually be achieved very well. To get a general idea of the size of the Röhren, I would like to clarify this here: 4W = 13.6cm You can also combine this lighting very well with others, but we'll get to that in a moment. Osram Dulux You can use this lamp with a single T5 tube. You can combine this lamp very well with others or use it exclusively, both are possible and useful. An example would be the combination of 2xT5 in white and an Other lighting One more note: No matter which lighting is chosen - the light sources, i.e. tubes, burners, bulbs or whatever - should be replaced after one year at the latest, as they lose power over time and no longer provide the sufficient spectrum. In the case of T5s, they can be replaced well before one year, as experience has shown that these bulbs lose their light stability more quickly than most HQI bulbs. However, there are also blatant outliers with HQI lamps that need to be replaced after a few months because the colour tailoring decreases. LED lighting: In the meantime, LED luminaires have also become an alternative. Although they usually cost a little more to buy, they have a much lower energy consumption and the bulbs do not need to be replaced once a year. For us, this is a real alternative because nano reef aquariums are not so high. In the core area, it is also possible to keep hard corals SPS. [image: [image: ]. Photo above: Product example of a very small flow pump, which is more suitable for small aquariums When buying a pump, make sure that it can be throttled. Pumps that can be throttled can be adjusted to the flow requirements of the individual inhabitants, so that Filter pumps? Product example of a small external filter in which absorbers, cotton wool or similar can be placed. In very small tanks, however, it is often better to regulate with water changes. The decision is ultimately between a possibility to use filter wadding/activated carbon or a little more space that such a pump would otherwise take up - but that is ultimately a Purifiers are used in many large aquariums nowadays, they come in many different sizes and from many different companies. Now, of course, the question arises: Should I build a protein separator into my nano reef? Photo above: Product example of a Sander Piccolo for aquariums up to approx. 60 litres Some companies have now developed relatively small skimmers that could theoretically be suitable for a nano aquarium. In practice, however, these devices are usually still very large and therefore take up far too much space in the aquarium; moreover, they generate a lot of small air bubbles in the aquarium during operation, which is also undesirable and can be irritating or even harmful for many animals. That is why I advise against the use of such skimmers in small aquariums; they are only really useful for aquariums larger than 54 litres. Temperature control in the nano reef To check the temperature in the aquarium, an immersion thermometer or, even better, a digital thermometer should be used; I consider the adhesive strip thermometers that are often sold to be too inaccurate. The heater It is important to ensure that the animals in the aquarium do not come into direct contact with the heater. The glass gets very warm in places, so that especially slow animals such as starfish or anemones cannot escape in time when the heater is switched on and can therefore be seriously damaged. For this purpose, I recommend building a round box made of plastic gauze that surrounds the heater at a distance of about 1 cm - but it is important that the whole thing is well covered by the current so that it is not damaged;However, the current should not press the frame against the heater - in case of doubt, it should be chosen a little larger. But: Never use wire gauze or other metal parts - metal has no place in contact with seawater! It is important to replace the heater immediately if it is defective - a broken heater can overheat the entire tank or even completely electrify it, which can be fatal for the keeper! It is also important to make sure that there is a GS or VDE mark on the heater, otherwise it can be just as dangerous. There are some models on the market that are not completely watertight, so when buying, make sure that the heater is completely submersible - this is usually stated on the packaging. A heater must never be allowed to run dry, as this will cause it to overheat and sooner or later damage itself, which can ultimately lead to the effects mentioned above. Therefore, ALWAYS make sure to switch off the heater for this time when working on the pool. IMPORTANT: Before the heater is used for its actual purpose in the aquarium, it should be tested in a filled 10 litre bucket of water (normal salt water/line water). A small How do you like this article?
After you have decided on an aquarium, you should think about the location. There are a few basic principles that must be taken into account when planning:
changing the water it must be easy to reach, as well as when working with corals and the like. Furthermore, there must of course be a power connection nearby for all the equipment. And last but not least, the aquarium must not be placed near a radiator and should receive as little sunlight as possible, otherwise it will heat up too much.
Lighting is crucial in just about any marine aquarium to keep the inhabitants healthy. Many corals and other sessile animals feed on symbiotic algae stored in their cells, so-called zooxanthellae, which in turn carry out photosynthesis and produce nutrients for the animal in question. Of course, this process requires enough light, otherwise the algae die and the animals starve to death - which is why lighting is essential. It is only unimportant in tanks where only a cylinder rose or a crayfish is to be kept, but we will come to that in later chapters. There are some quite acceptable types of lighting on the market, but the best results are achieved with the two I would like to introduce here - but first a few small explanations. 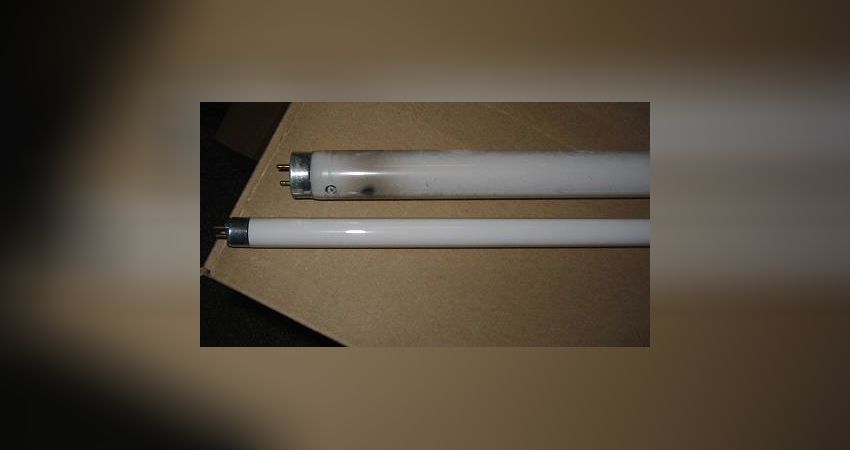
T8 luminaires are fluorescent luminaires that have a diameter of 26 mm and are still used today mainly in freshwater aquariums. They are usually only suitable to a limited extent for marine aquaristics due to their lower light yield. For years, they have been increasingly giving way to the subsequent T5 tubes in marine water.
The T5 tubes are completely different: These Röhren have a diameter of only 16mm, a much better light output and it is easier to install several Röhren üover the basin due to their smaller thickness. In addition, they are usually dimmable, so that with the appropriate ballasts even day times can be simulated in the aquarium. They do generate more heat than T8 tubes, but this can be regulated with fans if necessary. 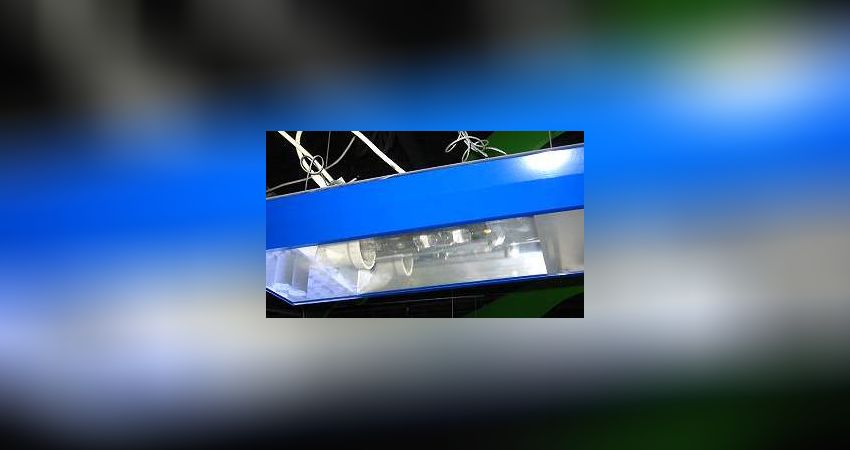
Astonishingly, aquarium companies have now also adapted to the steadily growing number of nano aquariums and have brought some smaller sockets and ballasts for smaller T5 tubes onto the market. These tiny 4-6W tubes are ideal for small aquariums because they are small and inexpensive and have a good light output. The company Arcadia has already brought out small double light bars for nano reef tanks with sockets for two tubes, which is of course somewhat cheaper and more practical. Supposedly there are also already small reflectors for these devices, but so far I have only seen them in complete sets.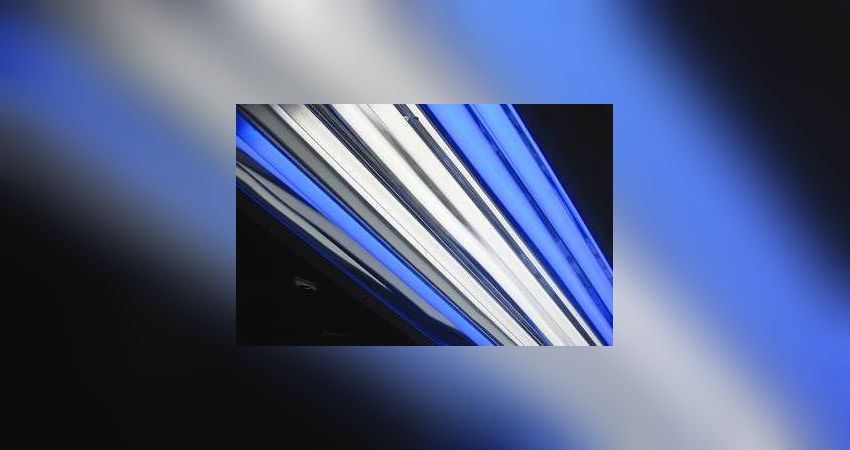
For aquariums, it is generally recommended to use a combination of blue and white fluorescent tubes, whereby care should be taken to ensure that the fluorescent tubes have their colours from the light spectrum and are not merely coloured; it is therefore usually advisable to buy somewhat higher quality fluorescent tubes. Good white light sources have at least 6500 K, anything below this is usually not sufficient for corals.
6W = 21.2cm
8W = 28.8cm
Now we come to a special type of lamp: the Osram Dulux TC. These lamps are available in blue and white and have a very good light output, so that even with a single T5 tube they enable the growth of some large polyp stony corals.
For these lamps, too, there are already practical ballasts with plug-in sockets, which are available with sockets for one as well as for two lamps.
Osram Dulux in blue, or simply two Osram Dulux, one in white and one in blue. In general, however, I tend to prefer a combination of Osram and T5 tubes. I consider 9W to be a good size for these lamps, with a length of 16cm they are still very easy to install, whereas more powerful lamps are naturally larger.
There are now countless types of lighting on the market, but only a few are really suitable for reef aquariums. I recommend the above-mentioned lights, as other lamps - such as HQI replacements - lead to the formation of unwanted algae or (like small T8 tubes) do not have the right light intensity for coral growth.
Of course, a reef aquarium needs a bit more than just good lighting, and the nano reef is no different. However, the technology in smaller aquariums is usually much simpler and cheaper and thus no comparison to the "real" aquarium.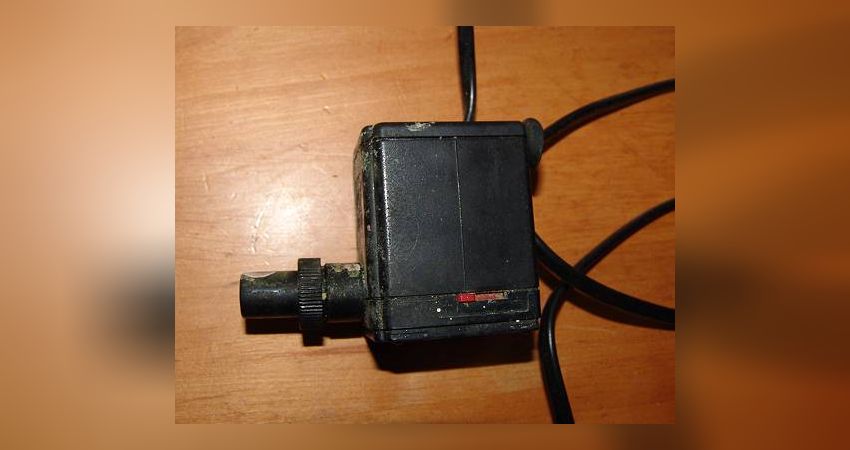
The most important point after the lighting is the pump of the aquarium. It is primarily used to generate current in the tank, because appropriate current is vital for the animals. A basic rule is that a good pump should completely circulate the contents of the tank at least 5 to 15 times per hour, whereby in the sea there is naturally a stronger current, which is why pumps with a flow rate of 150-200l/h are best recommended for smaller aquariums. The company Eheim in particular has developed small devices that are ideal for this purpose - such a pump usually only measures 10x5x5cm, so it can be easily accommodated in a small aquarium.
for example, a 150l pump in a tank with 12l(30x20x20cm) at full capacity has enough flow to keep small polyps;For example, a 150l pump in a tank with 12l (x x x cm) at full power will provide enough current to keep small polyp stony corals, which need a strong current, while it can be set so weak that even directly stroked tube worms feel comfortable, as they actually prefer a weak current. It is therefore worth buying a stronger, throttleable unit, as the current can be changed at any time together with the stocking (because whatever the stocking may look like in the planning - in the end it will be completely different animals).
By now at the latest, one or the other will be asking themselves the question: And what about filtration? Nowadays, filter material is hardly ever used in marine aquariums. Such pumps
usually turn into biological filters within a very short time, but this is undesirable in marine aquariums - this task is taken over by the living rock, and these filters also cause various inconveniences that are better avoided. Some aquarists leave such pumps running in their aquariums without a filter so that they can use filter wadding or activated carbon for a short time in case of water turbidity or poor water values. But actually this can be dispensed with, as such problems do not actually occur in nano aquariums or can be very easily remedied by changing the water.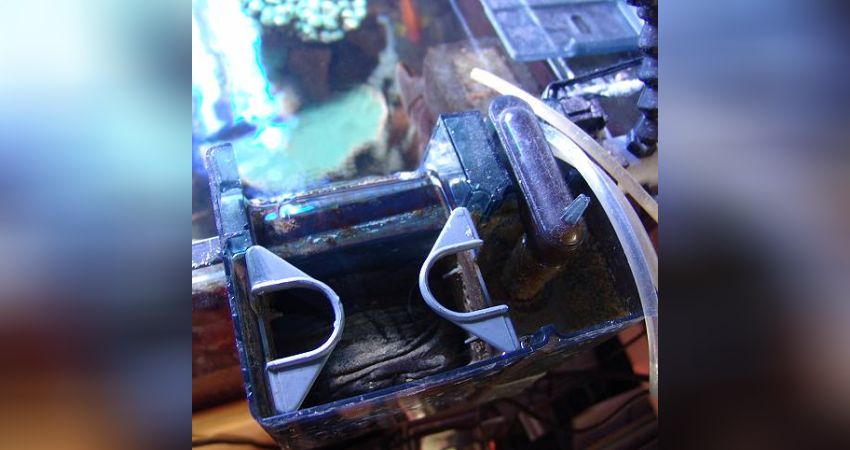
decision that everyone must make for themselves. However, if filter material of any kind is used, it must always be replaced or washed out after 3 to 4 days!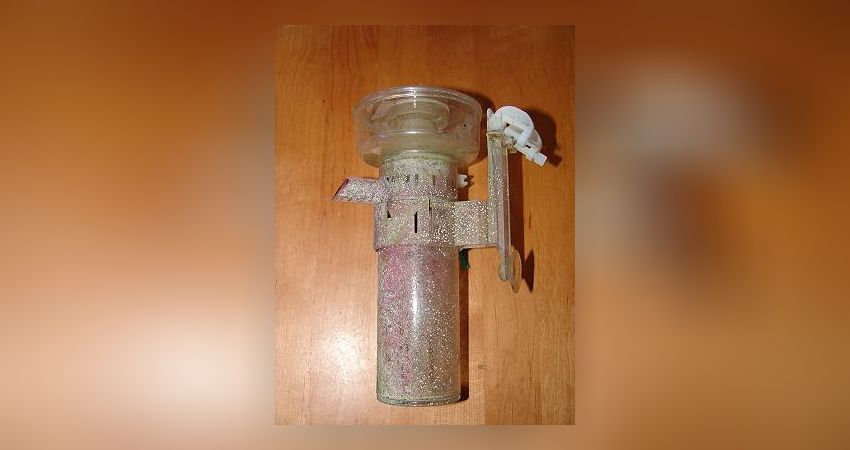
However, it also takes up space, as it is integrated inside.
Small amounts of water, such as a small aquarium, can cool down very quickly. However, many tropical animals need temperatures of 25°C to 26°C, so that cooling down to 18°C, for example, can already have fatal consequences. Fish, crustaceans and corals areothermic, i.e. they adapt their body temperature and thus their body functions to the temperature of the environment - a sudden sharp increase or decrease can therefore easily lead to problems. 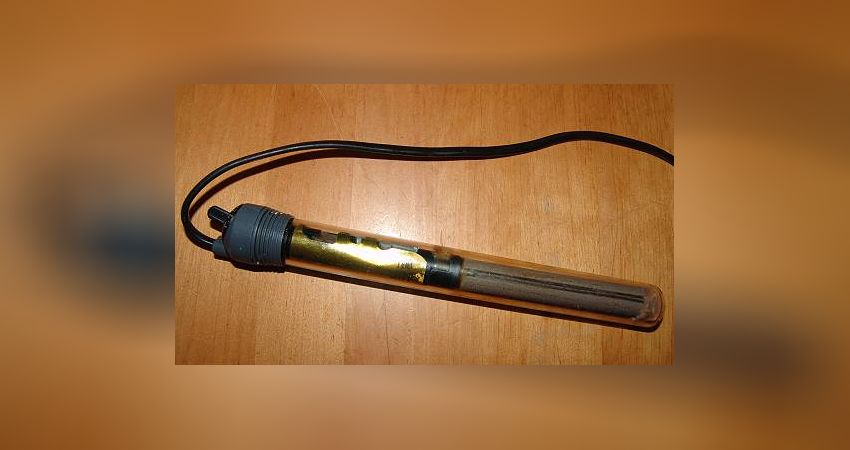
The rod heaters that have been used for many years are very suitable for heating the aquarium. They have been continuously developed and are accordingly small and powerful.
For tanks between 10l and 25l, heaters with 25W are suitable, larger tanks should be heated with 50W. Modern heaters, so-called control heaters, are equipped with a control system so that the desired temperature is set and then maintained exactly by a thermostat - once it is reached, the heater switches off and only becomes active again when the temperature drops. The purchase of such a heater is indispensable, but due to their small, unobtrusive design and the price starting at 10-15 euros, these devices are not a big sacrifice. Photo: Product example of a small heating rod, in this case for 40 -100 litres.
pump circulates the water in this bucket, and a thermometer must also be available for checking. The heater is then set to a desired temperature- say 25° C and placed in the bucket; then maintained accordingly and the thermometer checked now and then, especially when the thermostat switches the unit off. If the heater heats significantly more or not at all, it is probably defective, but if it has a deviation of 1-2°C, this is considered normal (an incorrectly set thermostat) and should be taken into account in future settings, i.e. the heater switches off at 2°C more, and if a temperature of 25°C is desired, set it to 23°C.
Info
Author

Bookmark
Comments
Topics
Similar articles
- 14 - Part 1 Filter systems - DSB
- 09 - The protein skimmer
- 37 - Pests Part 2
- 31 - Surgeonfish Part 3
- The Big Nano Reef by Silvia Gerhard
- 01 - Sources of information
- Mein Sera Biotop Cube 130 nach 18 Monaten Standzeit:
- 0 - Marine aquaristics the 1x1
- How a marine aquarium is created Part 27: Rust in the aquarium
- 05 - Technical basin
Comments To the top
Please register
In order to be able to write something yourself, you must register in advance.
